[Box_partner] My House2_ Paper house Play (Bathroom) Cardboard Playhouse _ Made in Korea
Box_partner
- Brand:
- Box_partner
- Product Code:
- My House_2
- Availability:
- Out Of Stock
Paper house play that fosters imagination and creativity_ Toilet, bathroom
-It can be assembled without glue or scissors, and fosters creativity and imagination through kitchen play and coloring games.
-Safe playset made of cardboard paper.
-Variety of role-play and customize your own home.
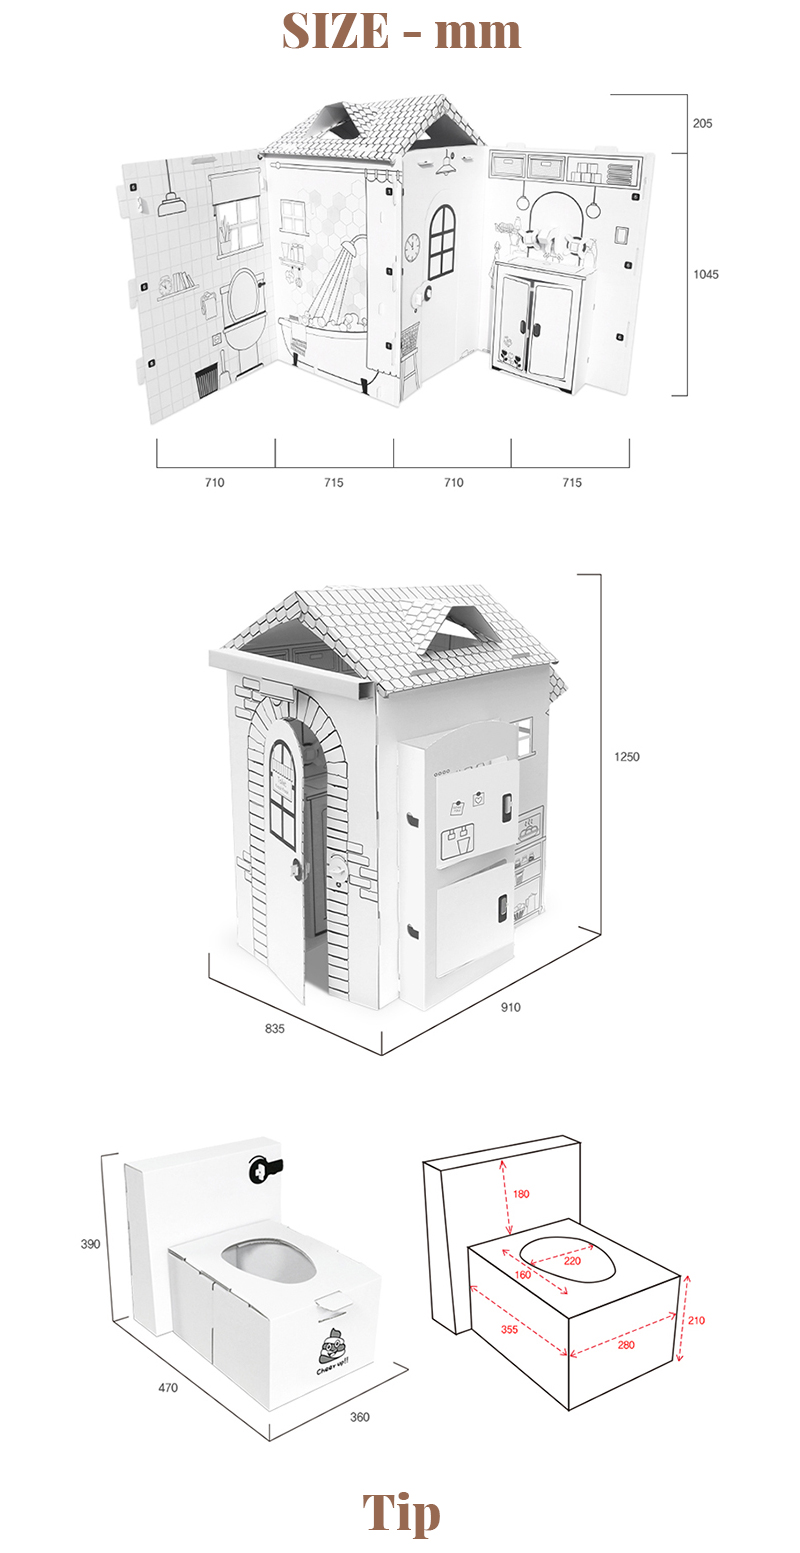
size_710x710x1270
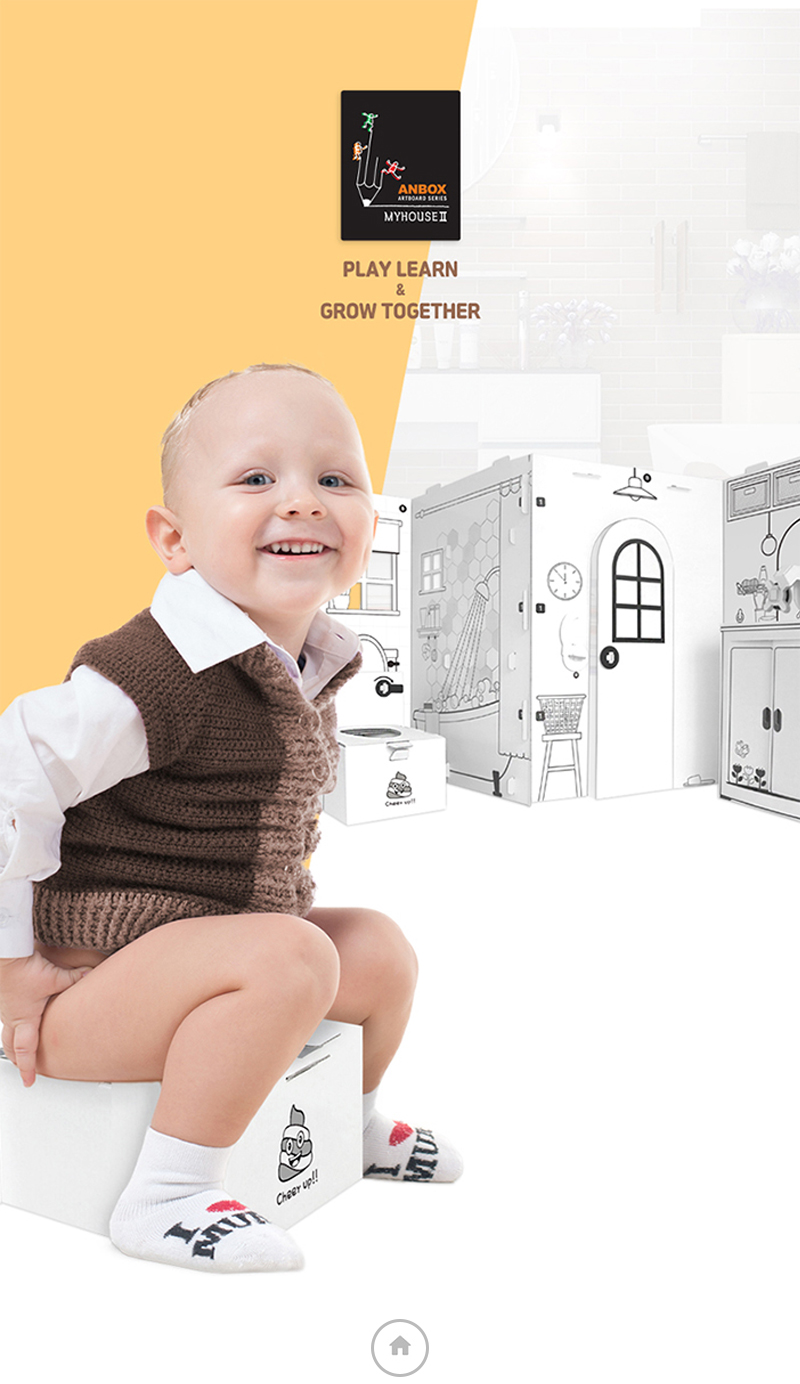
A house full of various things to do
My House II offers a variety of themed spaces, such as toilets and bathrooms, and adds imagination and creative fun to children by coloring and role-playing with family and friends.
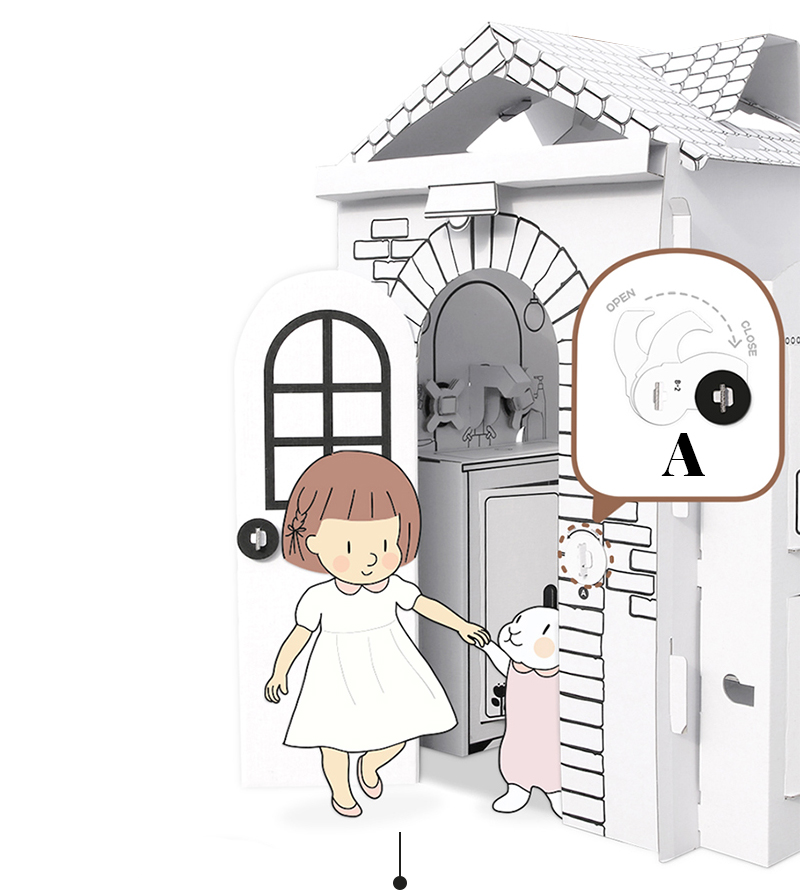
A The lock is designed to operate Open/Close.
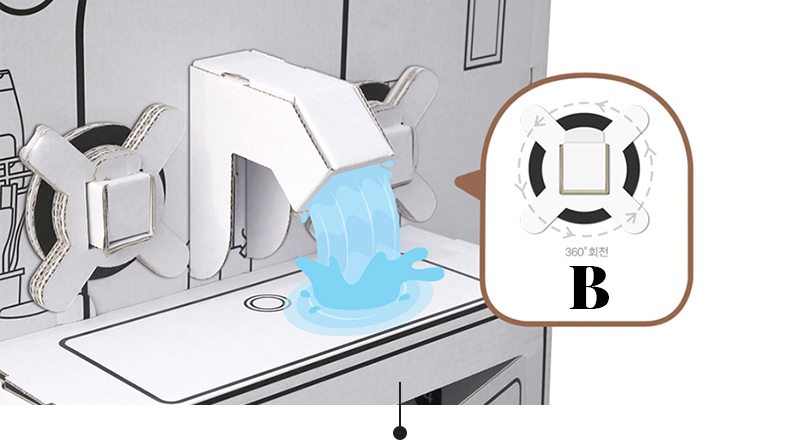
B A sink with a rotating faucet handle can help your child develop a good habit of washing his hands.
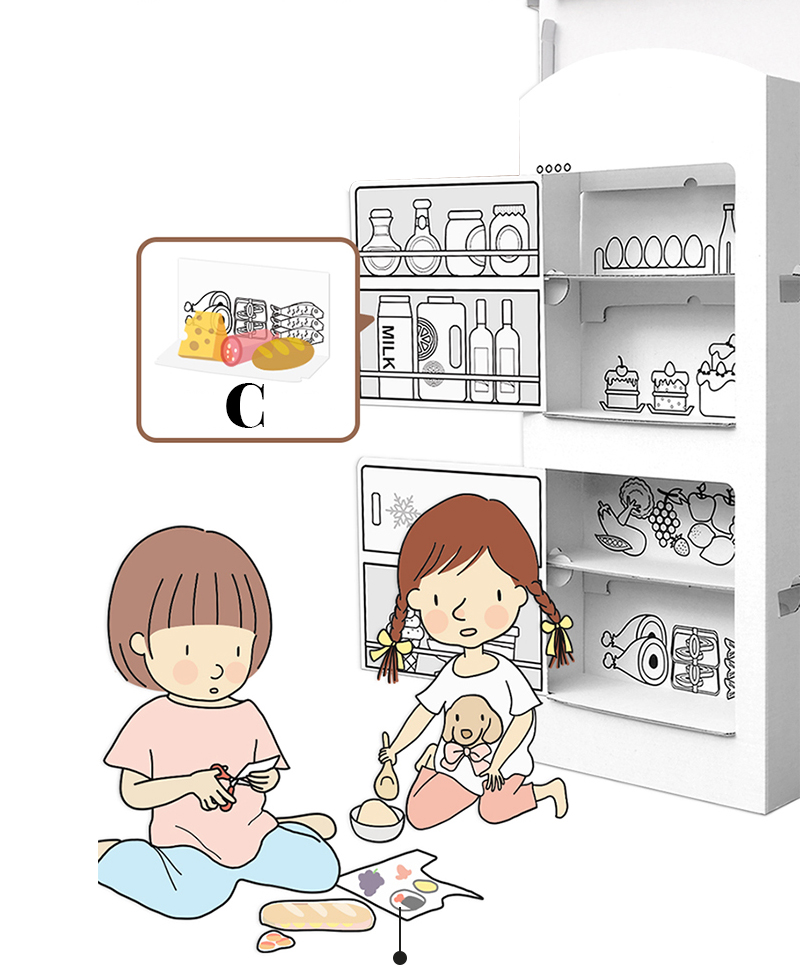
C There are actually doors that can be opened and closed, and shelves to put things on.

Toilet for toddlers
A play toilet that makes potty training easy and comfortable for our child who needs potty training
This product is for play, not for actual bowel movements.
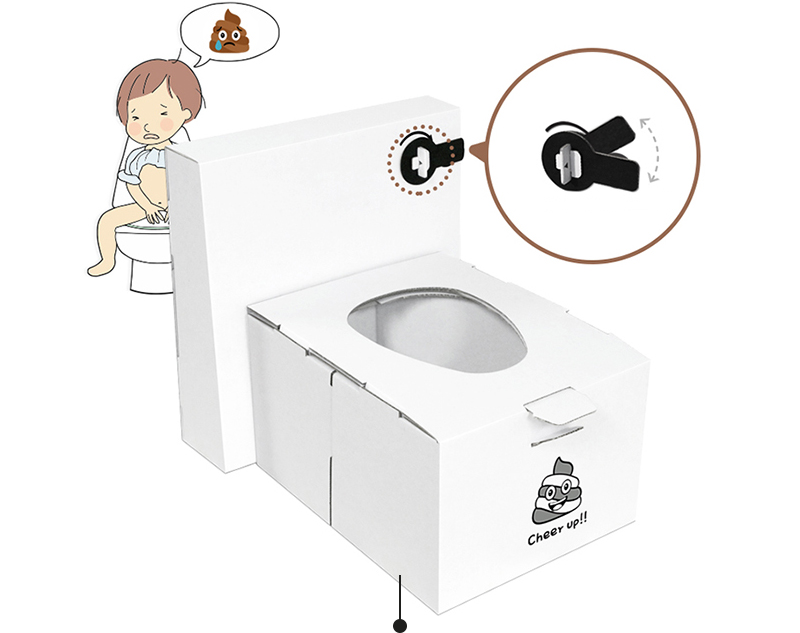
The toilet lever is designed to move in the direction of the arrow.

Play various games at once
By connecting My House I (kitchen play) and My House II (bathroom/toilet), you can create a more diverse themed play space.
Create a personalized play space for your child.
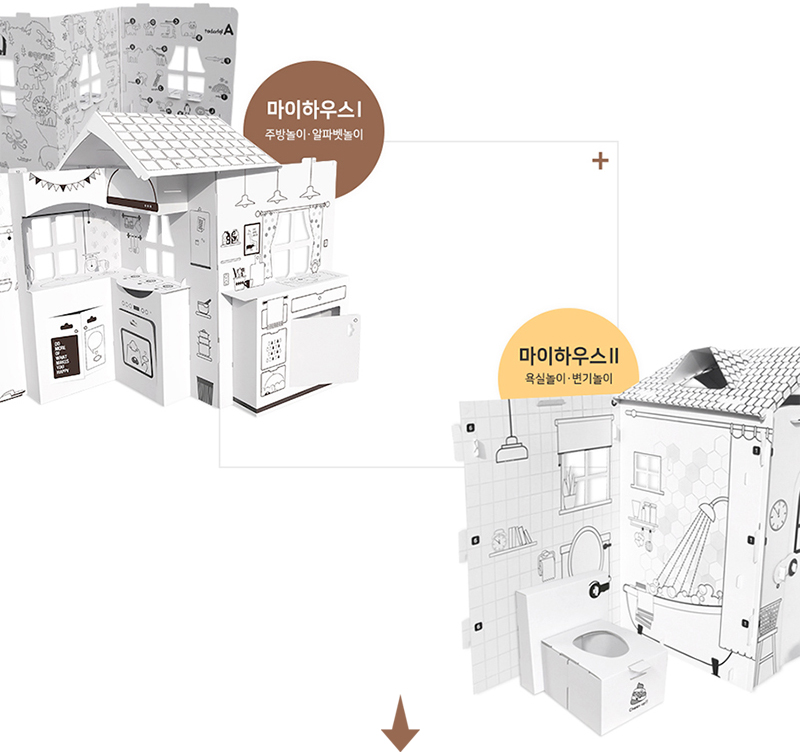
My House1
Kitchen Play
My House2
Bathroom play
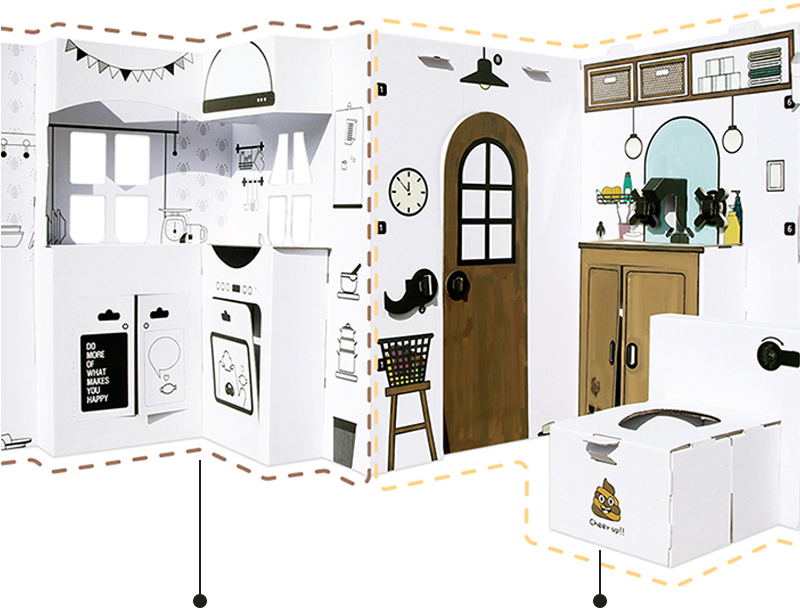
All cut surfaces of the product are made with wave knives (serrated knives) to prevent hand cuts caused by carelessness by children and the elderly.
Inserting the upward ring
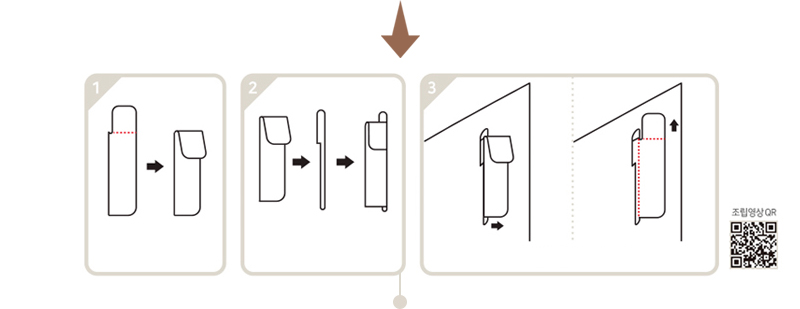
1 Fold the top wing.
2 Put it in the connecting groove in the folded state.
3 Put it all the way in and spread the top wings.
Insert the down ring
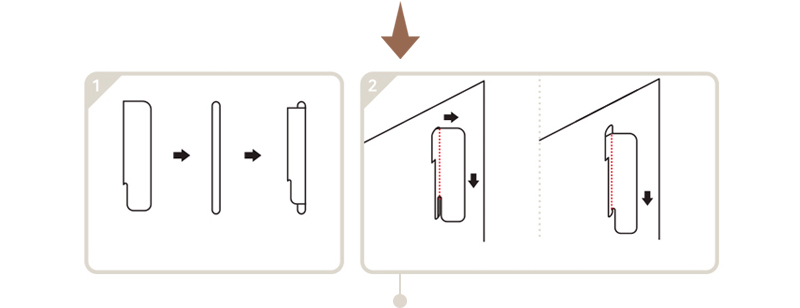
1 Put it in the connection groove.
2 Put it all the way down and lower it to the bottom.
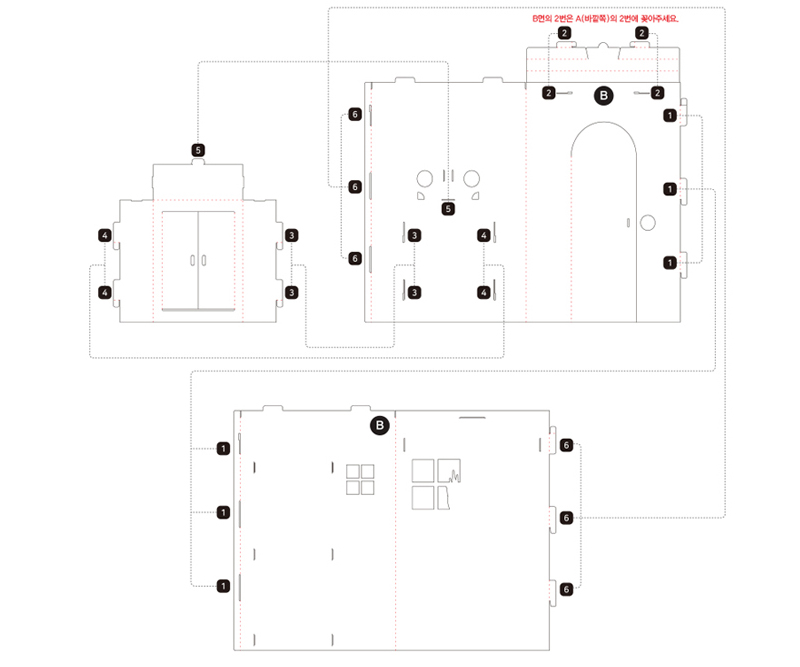
1.Body assembly (B/inner side)
Each side of the body is printed with a number according to the fastening position. Please sign the same number.
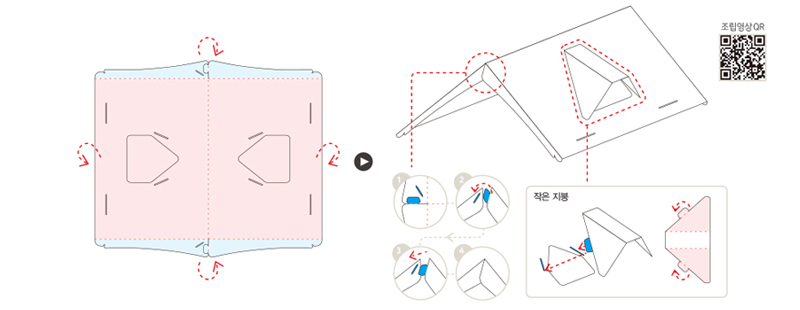
2.Roof assembly
Fold the blue part of the top and bottom 90 degrees.
3.Combining the main body & other parts (A/ outer side)
Insert the assembled roof, fresh refrigerator, and eaves into each position on side A as shown below.
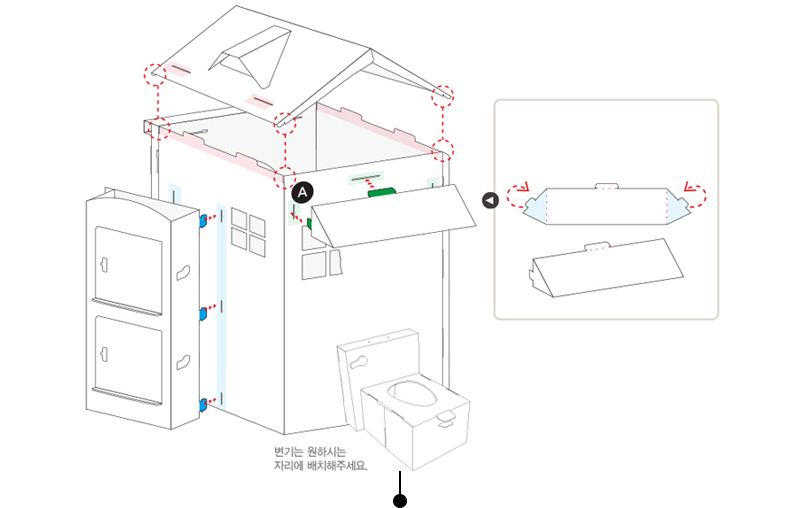
4.Fresh refrigerator
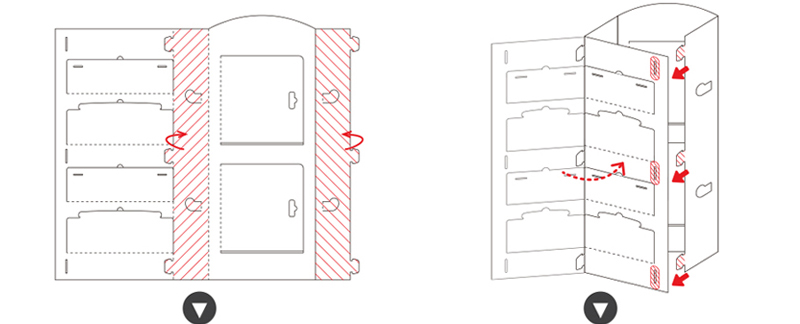
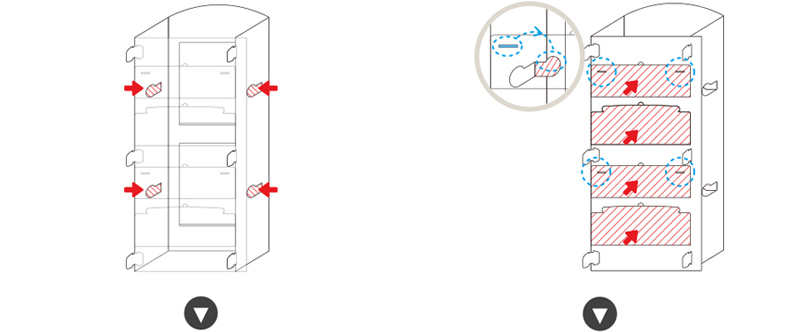
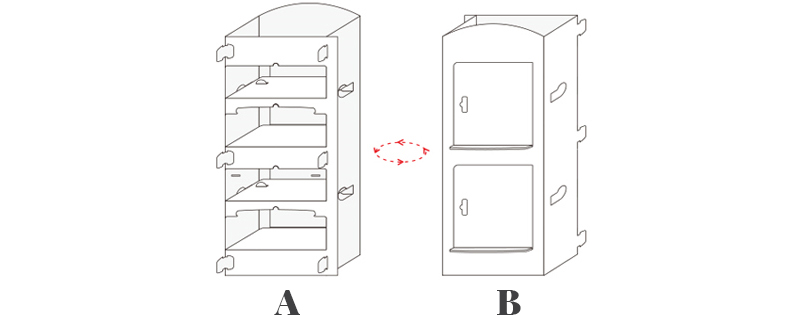
A Crisping refrigerator back B Crisping refrigerator front
5.Toilet bowl body


6.Backrest box
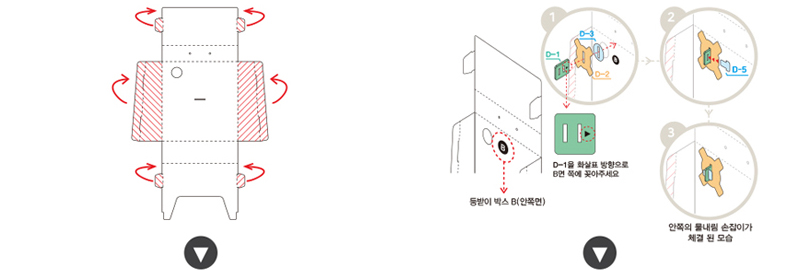
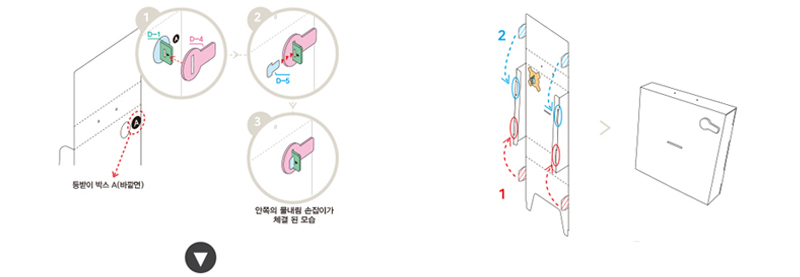
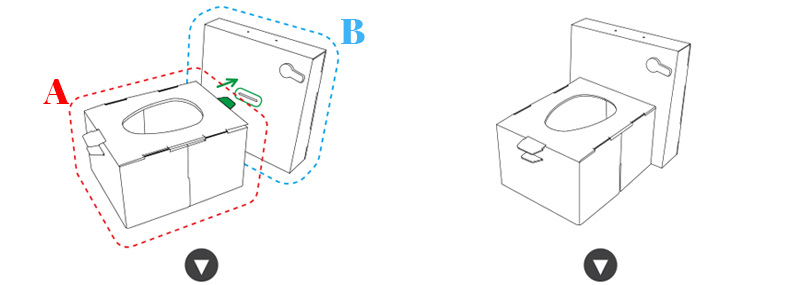
7.Handle body, main parts assembly direction guidance

The outer and inner sides of My House II are printed with A and B as shown in the picture above.
Assemble the A side and B side separately.
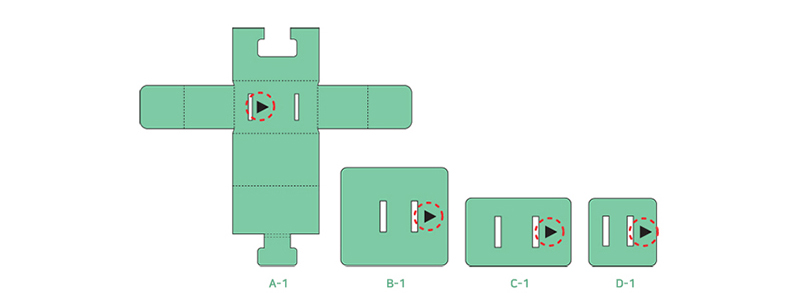
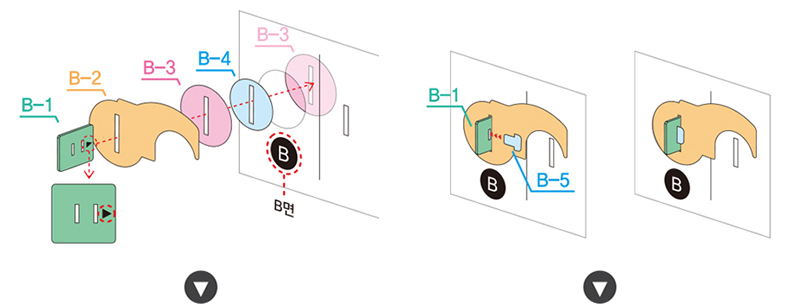
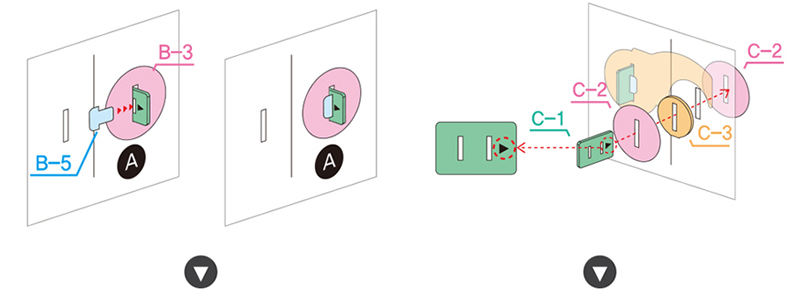
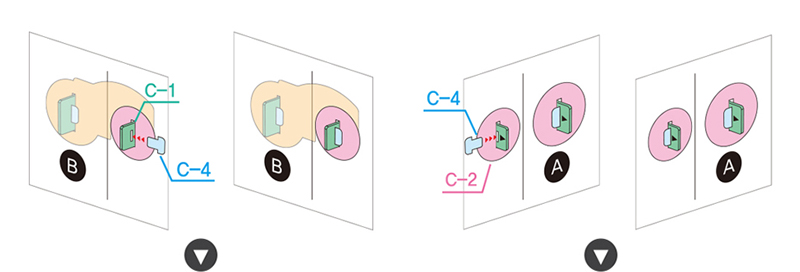
Each part is printed with an arrow indicating the direction of insertion.
(Please plug it in the direction of the arrow.)

Remove and fold the parts corresponding to each number from the faucet, handle, and lock pad.
8.Faucet, handle
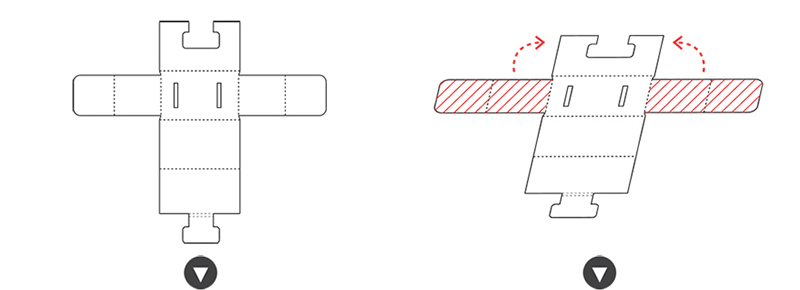
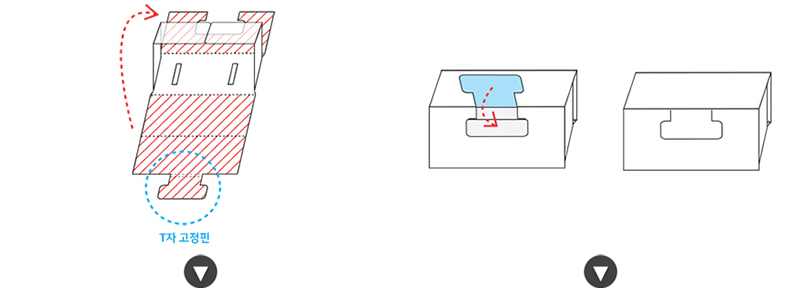

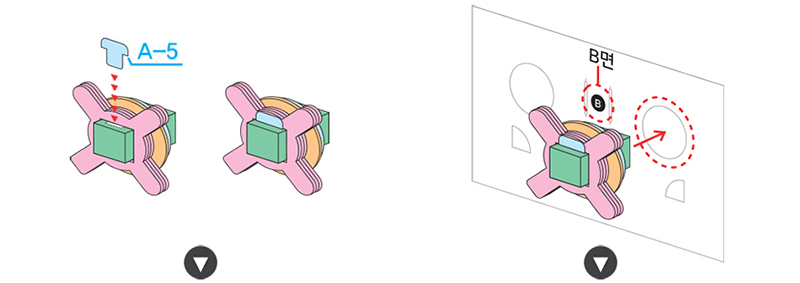


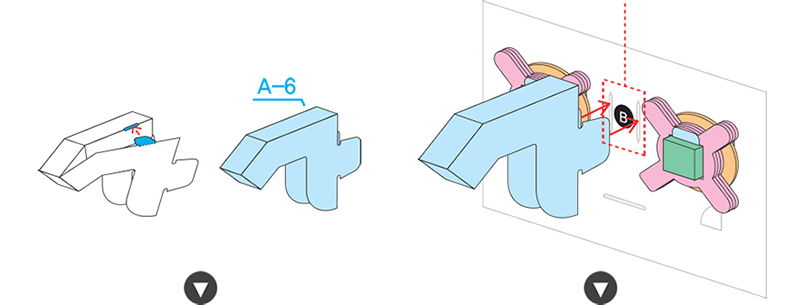
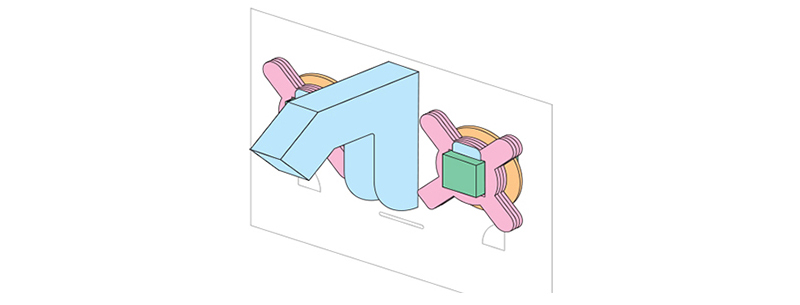
Faucet and both handles combined
9.Handle, lock
There are no reviews for this product.